> ## Documentation Index
> Fetch the complete documentation index at: https://docs.agentbees.ai/llms.txt
> Use this file to discover all available pages before exploring further.
# Create a task
> Describe what you want in plain language; an agent does it in an isolated workspace.
A **task** is one unit of agent work: a prompt, an agent, and a workspace. The
agent works in its own branch; you review and merge.
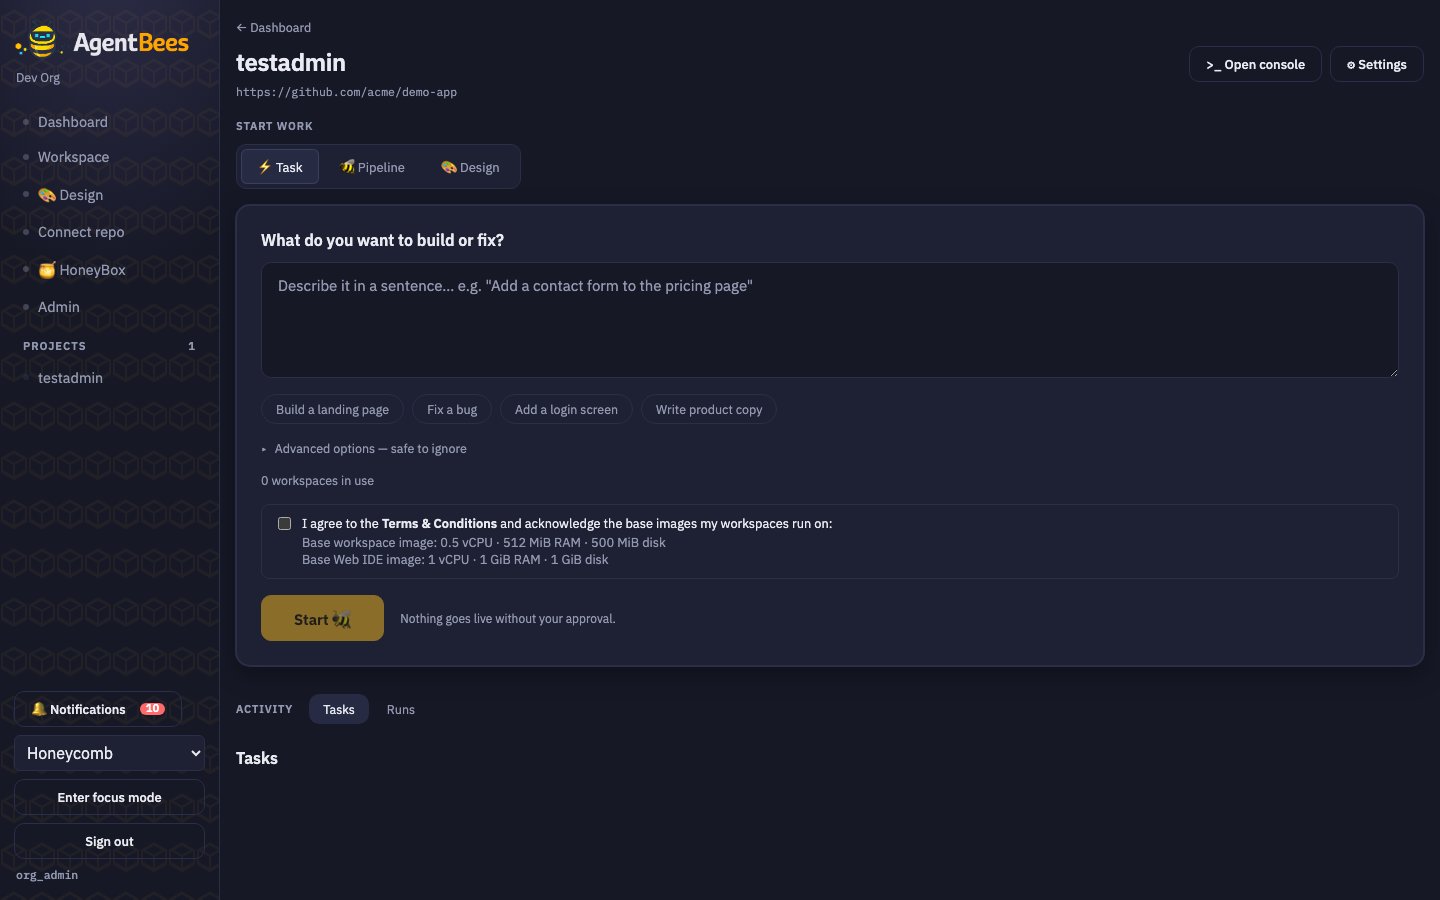 ## The quick path
On the project page, the "Start work" control has three tabs: **⚡ Task**, **🐝 Pipeline**, and
**🎨 Design**.
e.g. *"Add a contact form to the pricing page."* Example chips can fill the prompt for you.
Tick the Terms & base-image acknowledgment (see [Terms](/billing/terms)).
The agent provisions a workspace, clones your repo, branches, and starts. You're taken to the
task screen.
That's all most tasks need — everything else is optional under **Advanced options**.
## Advanced options
## The quick path
On the project page, the "Start work" control has three tabs: **⚡ Task**, **🐝 Pipeline**, and
**🎨 Design**.
e.g. *"Add a contact form to the pricing page."* Example chips can fill the prompt for you.
Tick the Terms & base-image acknowledgment (see [Terms](/billing/terms)).
The agent provisions a workspace, clones your repo, branches, and starts. You're taken to the
task screen.
That's all most tasks need — everything else is optional under **Advanced options**.
## Advanced options
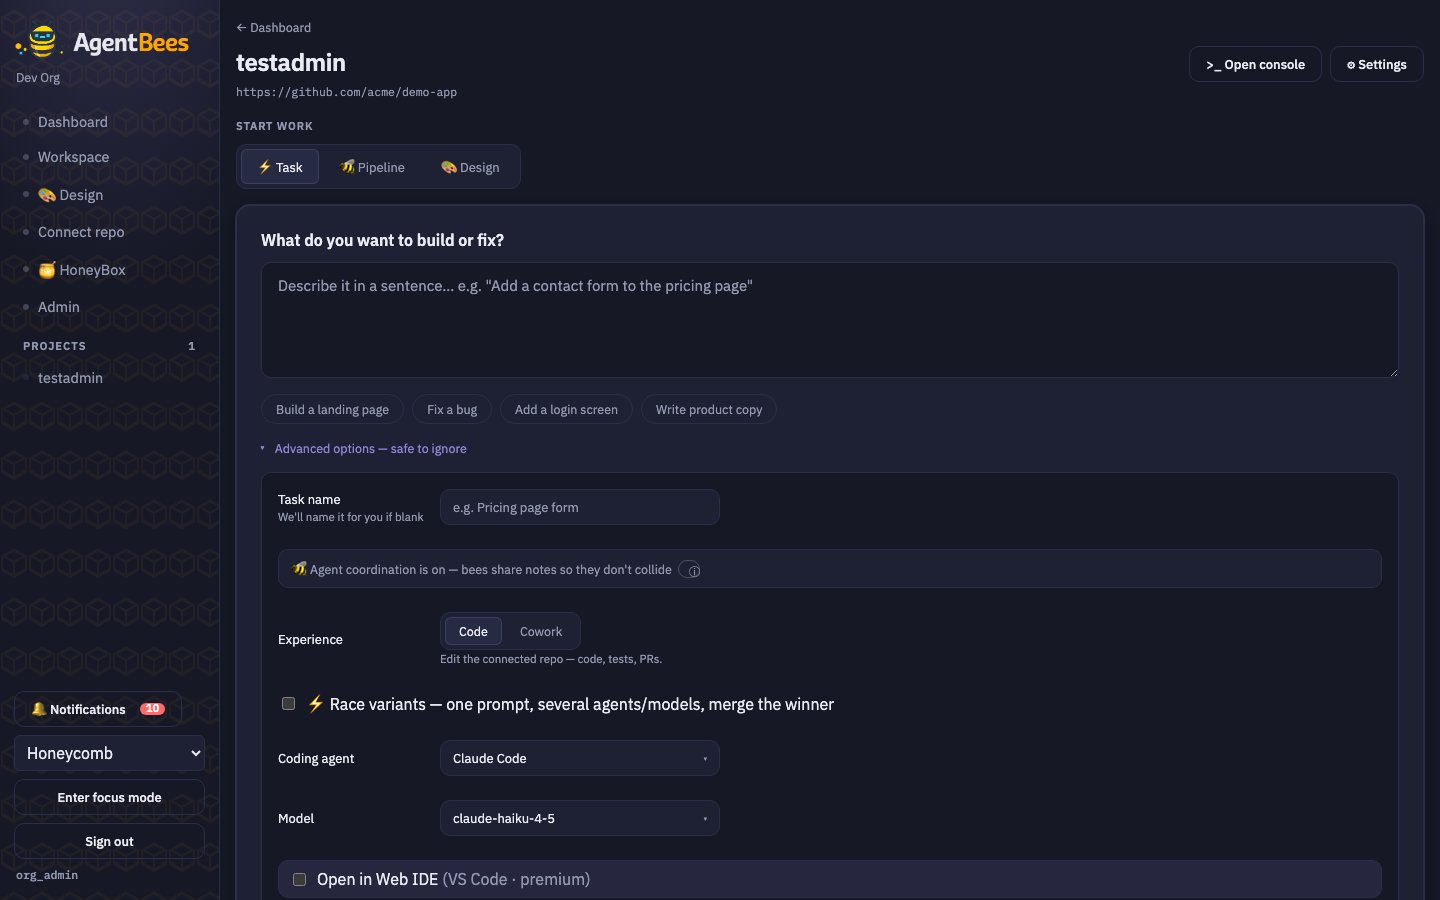 Expand **"Advanced options — safe to ignore"** for:
* **Task name** — optional; derived from your prompt if blank.
* **Experience** *(Claude only)* — **Code** (edit the repo) or **Cowork**
(a general assistant). Design has its own tab.
* **Coding agent** — Claude Code, Codex, Gemini, or Kiro (limited to your org's
allowlist). See [Agents](/agents/overview).
* **Model** — appears when your org allows more than one model for that agent.
* **Web IDE** — open the task in a full browser VS Code (premium; org-gated). See
[Web IDE](/workflows/web-ide).
* **Resources & add-ons** — allocate extra CPU/RAM from your org's purchased pool
(fine-grained, free allocation), and optionally enable **backup**.
* **Race variants** *(Code mode)* — run the prompt across several agent/model
variants at once and merge the winner. See [Multiple models](/agents/multiple-models).
A live **usage indicator** shows how many workspaces (and IDE seats) you're using against your
plan's cap, and blocks creation if you're at the ceiling.
## Just need a shell?
The project header's **"Open console"** starts an interactive shell in the cloned
repo (a Claude-agent task with `shell` mode) — handy for poking around without
launching a full agent run.
## What happens on submit
The task is created against your project, branching from the default base branch.
If you enabled the Web IDE, the task gets a heavier sandbox (1 vCPU / 1 GiB / 1
GiB). Extra resources are allocated from your pool and clamped to what's available.
Then you land on the [task screen](/workflows/guided-vs-developer-view) to watch,
review, and merge.
Expand **"Advanced options — safe to ignore"** for:
* **Task name** — optional; derived from your prompt if blank.
* **Experience** *(Claude only)* — **Code** (edit the repo) or **Cowork**
(a general assistant). Design has its own tab.
* **Coding agent** — Claude Code, Codex, Gemini, or Kiro (limited to your org's
allowlist). See [Agents](/agents/overview).
* **Model** — appears when your org allows more than one model for that agent.
* **Web IDE** — open the task in a full browser VS Code (premium; org-gated). See
[Web IDE](/workflows/web-ide).
* **Resources & add-ons** — allocate extra CPU/RAM from your org's purchased pool
(fine-grained, free allocation), and optionally enable **backup**.
* **Race variants** *(Code mode)* — run the prompt across several agent/model
variants at once and merge the winner. See [Multiple models](/agents/multiple-models).
A live **usage indicator** shows how many workspaces (and IDE seats) you're using against your
plan's cap, and blocks creation if you're at the ceiling.
## Just need a shell?
The project header's **"Open console"** starts an interactive shell in the cloned
repo (a Claude-agent task with `shell` mode) — handy for poking around without
launching a full agent run.
## What happens on submit
The task is created against your project, branching from the default base branch.
If you enabled the Web IDE, the task gets a heavier sandbox (1 vCPU / 1 GiB / 1
GiB). Extra resources are allocated from your pool and clamped to what's available.
Then you land on the [task screen](/workflows/guided-vs-developer-view) to watch,
review, and merge.